How to Setup a Professional Email Address With Gmail and Workspace
After creating a website, the first thing every business owner needs is a professional email address with their business name in it.
A professional email address will help you win trust when dealing with other businesses and customers. Google Workspace (previously known as G Suite) is a productivity suite that allows you to use Gmail with your own professional email address.
In this article, we will show you how to set up a professional, custom-branded email address with Gmail and Workspace.
What Is a Professional Email Address?
A professional email address is one that has your business name in it. For example, john@myphotostudio.com is a professional email address.
Email accounts on free email services like john.photographer@gmail.com are not as good for business because they do not look professional. Your customers and other businesses will find a professional email address more trustworthy.
For a professional email address, you will need a domain name and a website. We have step-by-step guides on how to choose a domain name and how to quickly make a website.
If you already have a domain name and a website, then you are ready to set up your own professional email address.
Why Use Google Workspace for Professional Branded Email Address?
You might be thinking, why use Google Workspace when most WordPress hosting companies offer unlimited email accounts with your own domain name?
Email is one of the most important communication tools for business owners. If you miss an important email, then it can hurt your business.
Many web hosting email servers are unreliable, restrictive, isolated, and less secure. You won’t even know if the email you sent was actually delivered.
Gmail is the industry leader in email, with over 1.8 billion active users. Google Workspace is Google’s productivity app suite for business owners, which includes Gmail and is used by over 6 million businesses.
Google Workspace works with your own domain name, which allows you to use Gmail to create your professional branded email address.
Here are some of the benefits of using Workspace and Gmail for a professional email address:
Professional business email address on your own domain
Gmail’s rock-solid security and spam filters
30GB to unlimited storage
Manage email even when offline using Gmail app on mobile devices
Works anywhere: web, mobile, tablet, you name it
Works great with Outlook and can even sync old Outlook accounts
Each user can have up to 30 email aliases
Use Google Calendar and Google Meet for chat, video, and voice calls using your own business email address
No advertisements and 24/7 professional support whenever you need help
Works seamlessly with your WordPress site
Most important of all: high deliverability, no delays, and no ending up in the spam folder
Now that you know why using Google Workspace for professional emails is important, let’s take a look at how to set up a branded professional email address.
Editor’s Note: We use Google Workspace for all of our professional email addresses and can honestly say it’s the best.
Setting up a Professional Email Address with Gmail (Workspace)
It starts at $6/month for each user, billed annually. Google also offers a free 14-day trial, which allows you to test drive everything before you make up your mind.
Basically, you get all the powerful features you are used to with Gmail, Drive, Calendar, and more, but now they are for your business.
Simply visit the Google Workspace website and click on the Get Started button for the plan you want to use.
Next, you need to enter your business name, select the number of employees, and the country where you are located.
You can choose the ‘Just you’ option for yourself for 1 user account or select the number of employees.
Once you are done, click on the ‘Next’ button to continue.
In the next step, you will be asked to enter your personal contact information, including your name and email address.
After that, you will be asked to choose a domain name. If you already have a domain name, then click on the ‘Yes, I have one I can use’ option.
Otherwise, you must click on ‘No, I need one’ to register a domain name.
For this tutorial, we will use the ‘Yes, I have one I can use’ option.
It’s important to note that if you need to register a new domain name, then you will be charged separately for registering a new domain name.
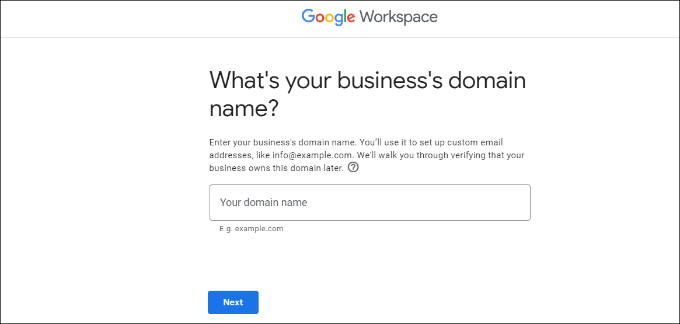
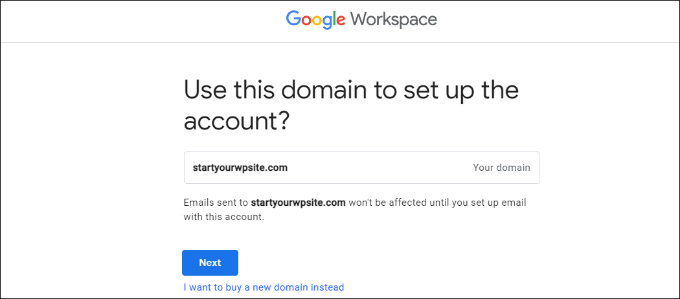
Next, you will need to enter your business domain name and click the ‘Next’ button.
After that, Google will confirm your domain name.
Go ahead and click the ‘Next’ button.
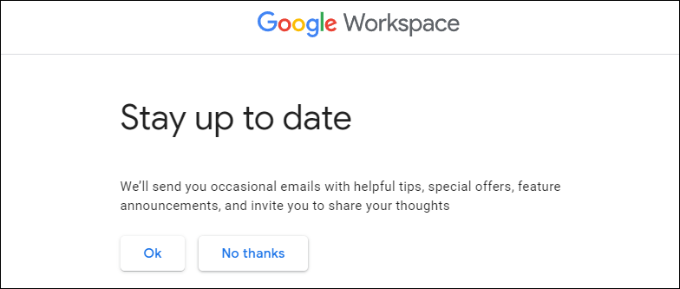
On the next screen, Google will ask you if you’d like to stay up to date with helpful tips, special offers, and more.
You can click the ‘Ok’or ‘No thanks’ button to move ahead.
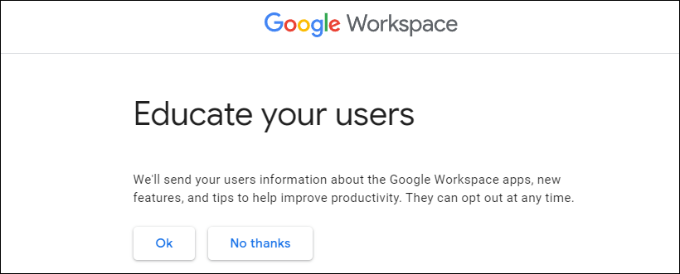
After that, you can also choose to send users information about Google Workspace and its features.
If you’d like to opt for this option, then click the ‘Ok’ button.
In the next step, you will be asked to create your Google Workspace user account by entering a username and password.
This username will also be your first professional email address. So, you need to choose a suitable and professional username.
After entering the details, you must check the reCAPTCHA box and click the ‘Agree and continue’ button.
You have now successfully created your Workspace account. You can now click on the ‘Continue to setup’ button.
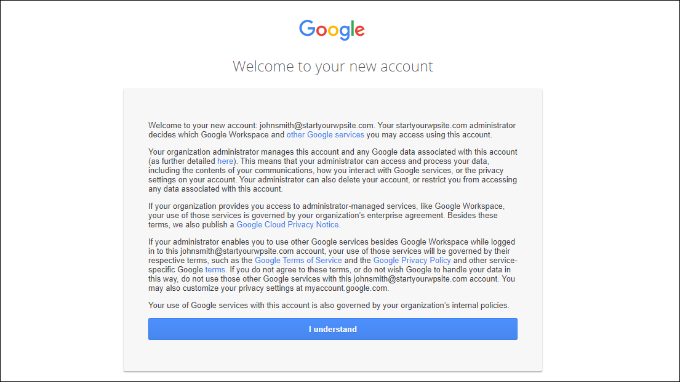
On the next screen, you will be asked to sign in to your newly created account.
After signing in, you will need to agree to Google services. Simply click the ‘I understand’ button to continue.
You can now follow the onscreen instructions to complete the setup.
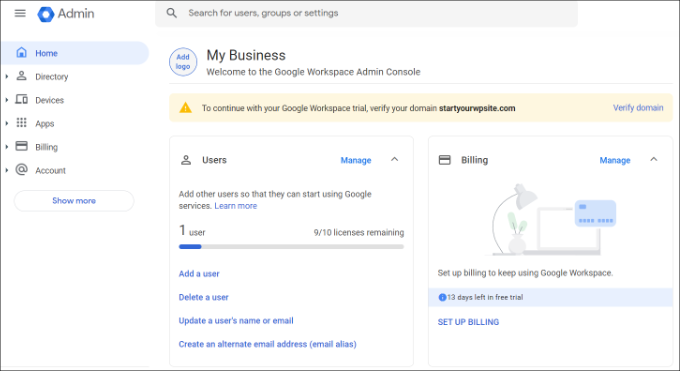
Once that’s done, you will see the Admin console.
The next step is to verify your domain.
Verifying Your Domain in Google Workspace
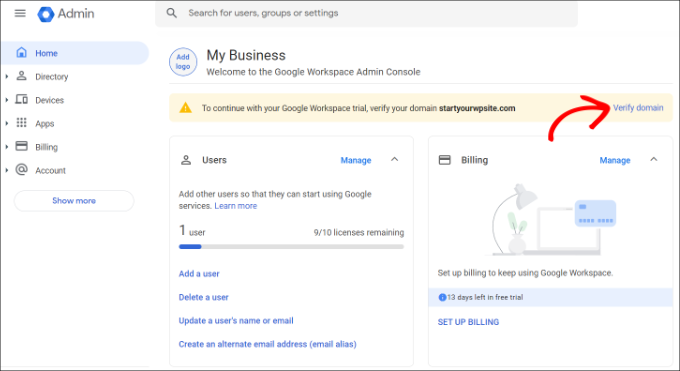
If you registered your domain name elsewhere, then you will now be asked to verify your ownership of it.
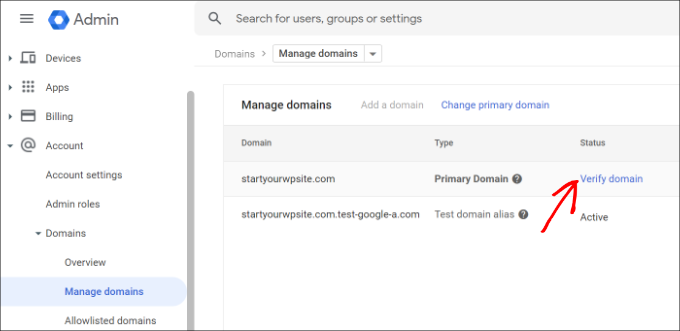
From the Admin dashboard in Google Workspace, simply click the ‘Verify domain’ option.
Alternatively, you can also go to Account » Domains » Manage domains from the menu on your left.
From here, simply click the ‘Verify domain’ option.
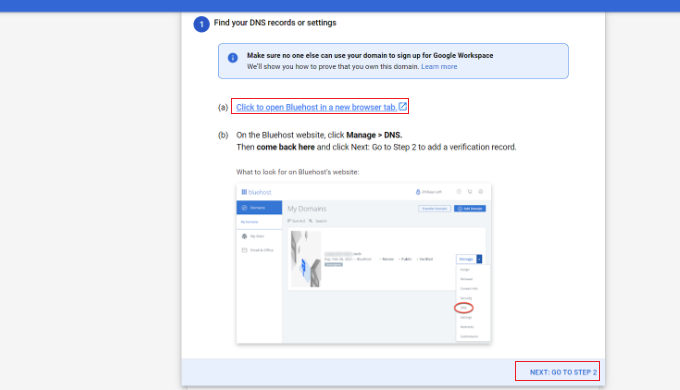
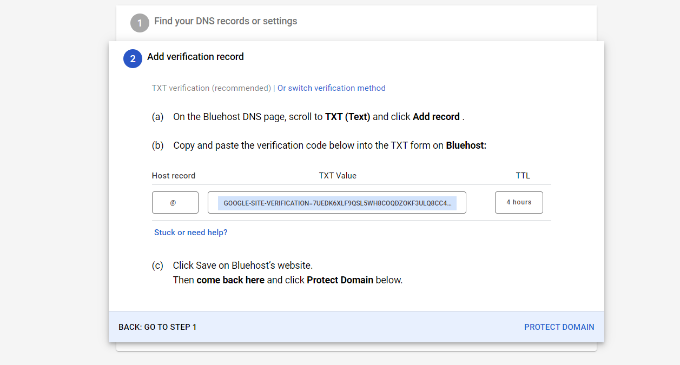
On the next screen, you will be asked to find the DNS records or settings of your domain host.
For this tutorial, we will be using Bluehost. However, Google will automatically detect your domain host.
You can click the link to open the hosting settings and then click the ‘Next: Go to Step 2’ option at the bottom.
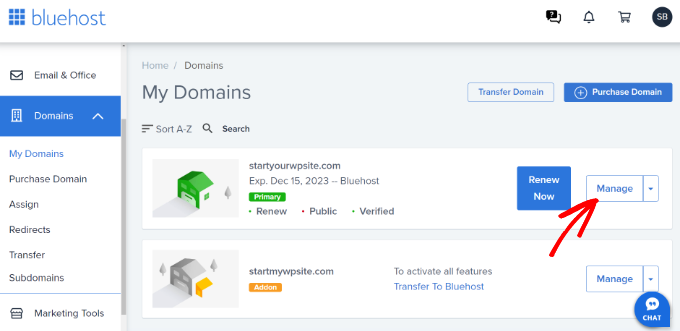
Next, you will need to log in to your hosting provider.
In Bluehost, you can head to Domains » My Domains from the left panel.
After that, simply click the ‘Manage’ button for your domain.
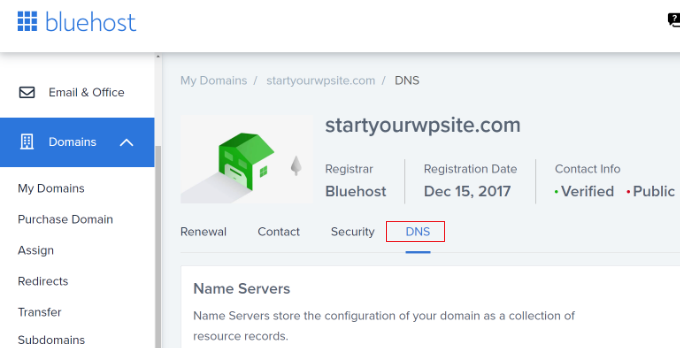
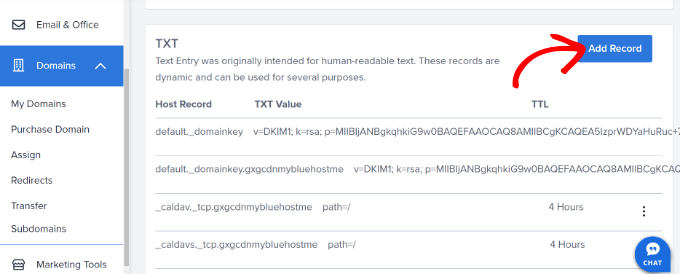
Next, you will need to switch to the ‘DNS’ tab.
From here, you can scroll down to the TXT section.
Go ahead and click the ‘Add Record’ button.
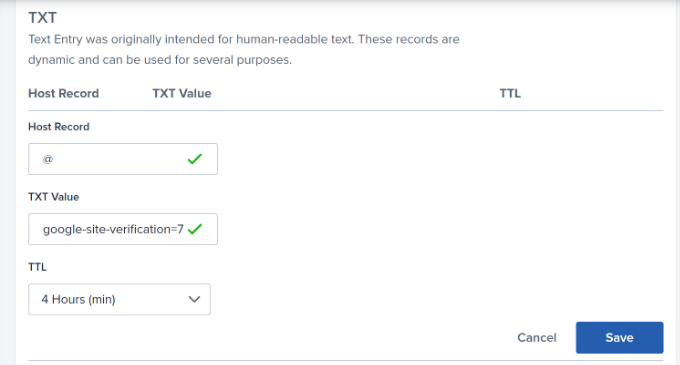
After that, you will need to enter the TXT details.
Here are the details you need to enter:
Host Record: @
TXT Value: Google site verification code
TTL: 4 Hours (min)
You can find the TXT record details in the Google Workspace settings.
Simply switch to the window or tab where you have the settings open, and under the ‘Add verification record’ step, you will see all the details.
Don’t forget to click the ‘Save’ button when you are done.
After you have saved the TXT record in Bluehost, just click the ‘Protect Domain’ option.
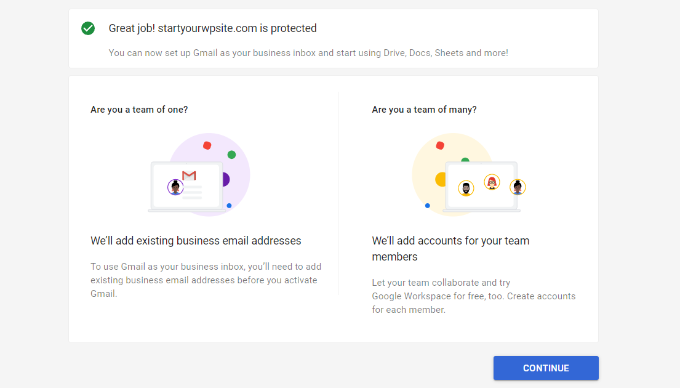
It will a take few seconds to verify the details. Once that’s done, you will see a message that your domain is protected.
Go ahead and click the ‘Continue’ button.
You’ll be taken to the ‘Manage domains’ settings in the Admin console in Google Workspace. You should see the status for your domain change to ‘Verified’.
Using Your Professional Email With Workspace and Gmail
Your email account works like any other Gmail account. You can access it by visiting Gmail and signing in with your email address, like john@yourdomain.com.
You can also manage your Google Workspace account by visiting the Admin console.
In the ‘Users’ section, simply click on ‘Manage’. This is where you can add/remove new users to your domain name.
Each of your users will have at least 30GB storage or the storage defined in your pricing plan, along with all the same features. However, they will not have access to the Admin console. You can also remove those users at any time.
Troubleshooting Google Workspace Domain Setup
Your web host may not be using a dashboard like the one we have shown in the screenshots above.
Google Workspace has detailed documentation for many of the popular web hosting and domain registration service providers. Simply visit the activate Gmail for Google Workspace page, and then locate your domain registrar or web host from the list.
If you do not find your service provider in the list, then you can ask them directly to help you set up Google Workspace for your domain name.


")
")

")

")


Leave a Reply