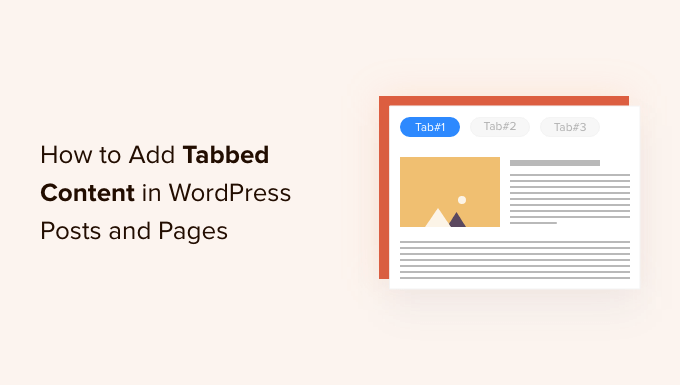
How to Add Tabbed Content in WordPress Posts and Pages
Do you want to divide your posts into tabs to save space and make it easier for users to find what they’re looking for?
Adding tabbed content helps you add more information about your products and services. It also allows users to find all the details in a single place instead of going to a different page.
In this article, we will show you how to add tabbed content to WordPress posts and pages.
When Should You Use Tabbed Content in WordPress?
Using tabs allows you to add more details in a small amount of space or split large chunks of content for better organization and user experience.
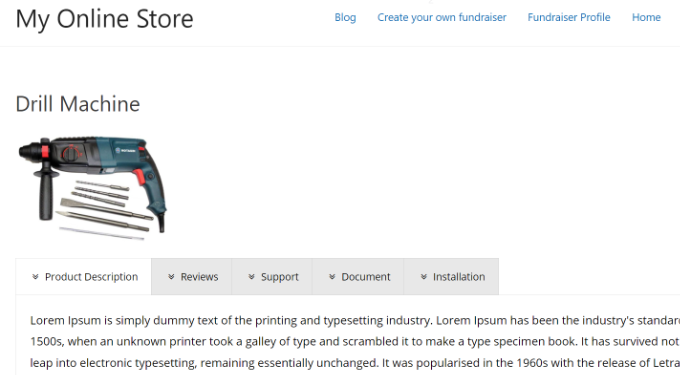
Let’s say you have an online store. You can add tabs for product descriptions, reviews, technical specifications, and more. This separation helps provide all the details for your customers in one place and makes the page interactive.
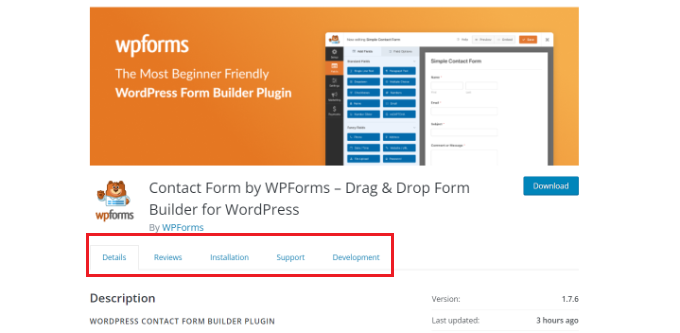
Similarly, you can see tabbed content on WordPress.org plugin pages. The page is divided into different sections using tabs like details, reviews, installation, support, and development information.
Tabbed content helps keep people on your WordPress website. You don’t have to send people to another page to get all the details they need about your products and services.
That said, let’s see how you can add tabbed content to WordPress pages and posts.
Here are the 2 methods we’ll use to get this done:
Method 1: Adding Tabbed Content Using a Landing Page Builder
The best way to add tabbed content in WordPress is using a SeedProd. It’s the best WordPress landing page and website builder. SeedProd is beginner-friendly and comes with a drag-and-drop builder, pre-made templates, and multiple customization options.
For this tutorial, we’ll use the SeedProd Pro license because it includes advanced blocks to add tabbed content. There is also a SeedProd Lite version you can use for free.
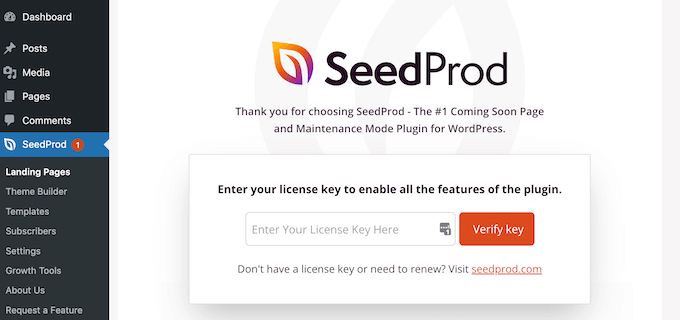
First, you’ll need to install and activate the SeedProd plugin. If you need help, then please see our guide on how to install a WordPress plugin.
Upon activation, you will be redirected to the SeedProd welcome screen in your WordPress dashboard. Go ahead and enter your license key, which you can find in your SeedProd account area.
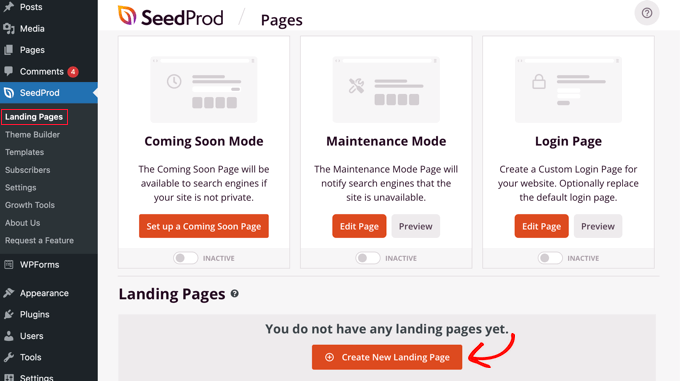
Next, you can head to SeedProd » Landing Pages from your WordPress admin panel.
After that, simply click the ‘Create New Landing Page’ button.
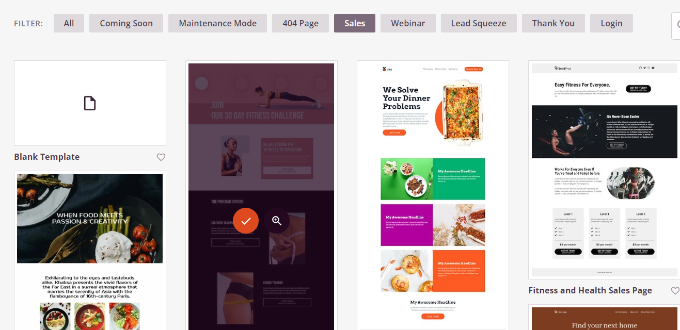
From here, SeedProd will show you multiple landing page templates to choose from.
Go ahead and select a template that you’d like to use. Just hover over the template and click the orange tick mark icon.
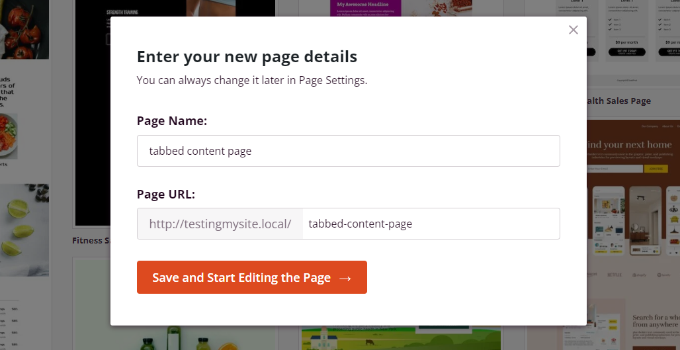
A popup window will now open where you’ll need to enter a title for your page in the ‘Page Name’ field, and a permalink slug under ‘Page URL.’
After that, simply click the ‘Save and Start Editing the Page’ button.
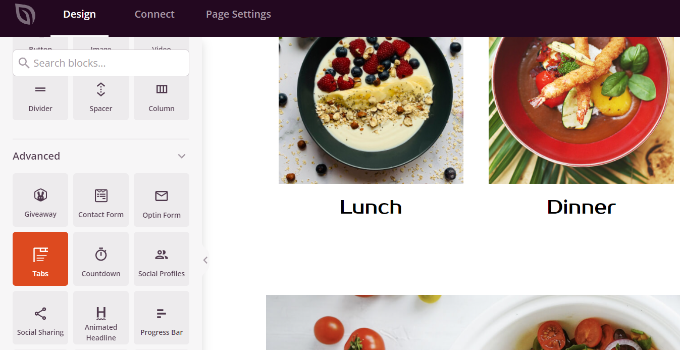
This will launch the SeedProd drag-and-drop builder. You can now add different blocks to your template and edit existing elements.
To add tabbed content, simply drag the ‘Tabs’ block under the Advanced section and drop it onto the page template.
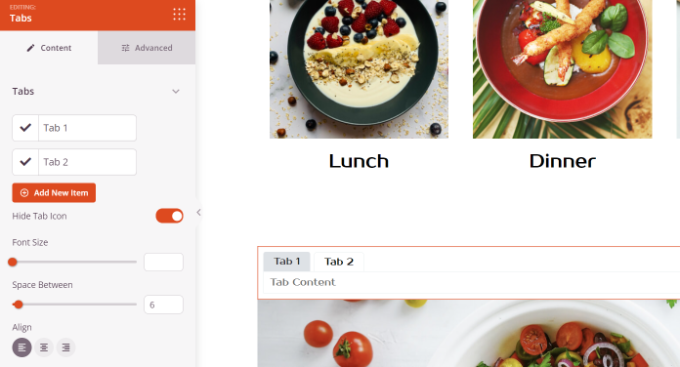
Next, you can customize the tab block in SeedProd.
For instance, you can click the ‘Add New Item’ button to add as many tabs as you want. Plus, there are options to edit the font size, space between text, and alignment for the content in each tab.
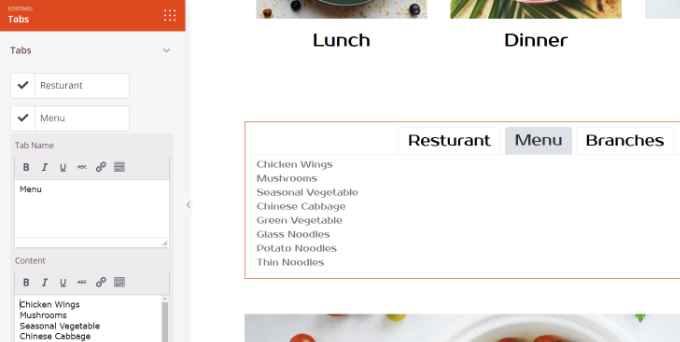
Next, you can click on any tab to edit it further and add details.
For instance, you can change the title for each tab, add content, and change the tab icon.
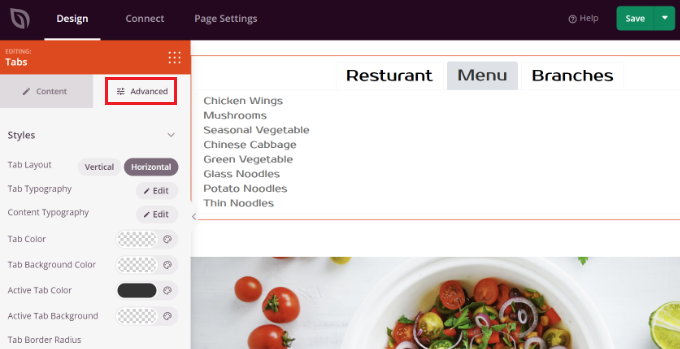
Besides that, SeedProd also provides advanced customization options.
Simply click the ‘Advanced’ tab in the menu on your left. Here, you can change the tab layout, typography, color, background color, borders, and more.
When you’ve made changes to the tab block and customized your landing page, don’t forget to click the green ‘Save’ button at the top.
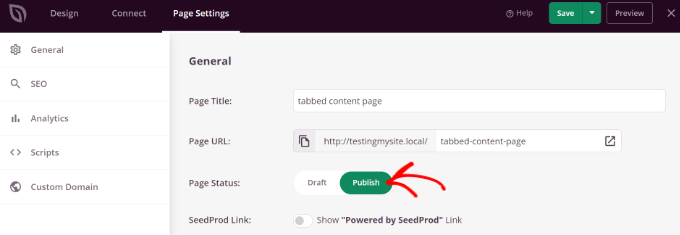
After that, you can head to the ‘Page Settings’ tab.
Next, you can click the ‘Page Status’ toggle and change the status from Draft to Publish.
You can click the ‘Save’ button to store your changes and close the page builder.
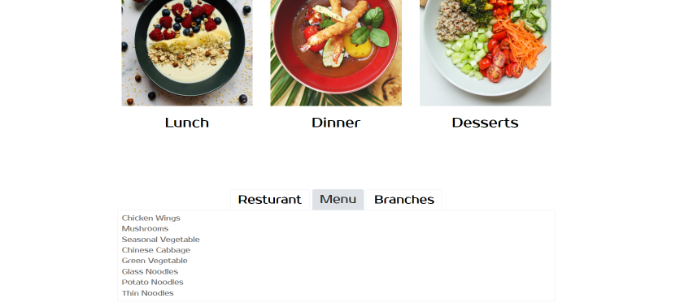
Now, simply visit your website to see the tabbed content WordPress page in action.
Method 2: Adding Tabbed Content Using a WordPress Plugin
If you don’t want to use a landing page builder, then you can use a dedicated WordPress plugin to add tabbed content to your posts and pages.
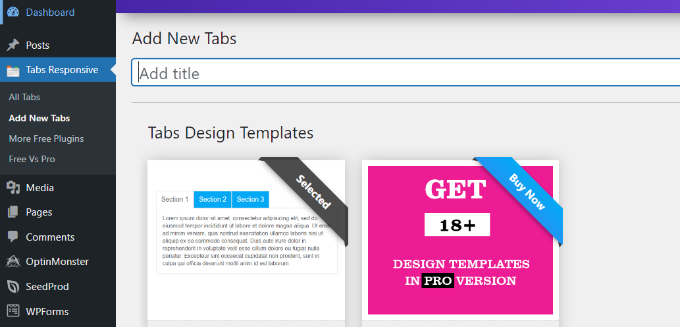
Upon activation, you can go to Tabs Responsive » Add New Tabs from your WordPress dashboard and start by entering a name for your tabs.
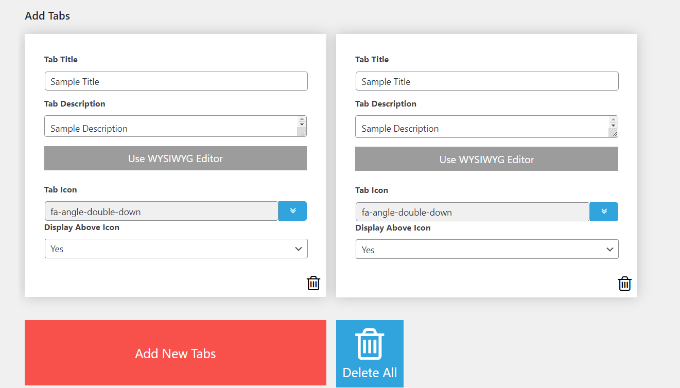
Next, you can scroll down to add as many tabs as you want by clicking the red ‘Add New Tabs’ button.
Plus, you can edit each tab individually by changing its title, adding a description, using a different tab icon, and editing the icon location.
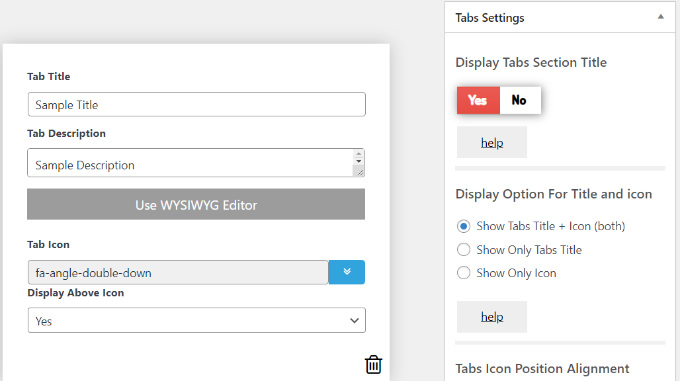
Besides that, the plugin also offers different ‘Tabs Settings’ in the menu on your right.
For instance, you can choose whether to display tabs title, select different options for title and icon, change icon position, show tabs border, select text color, and more.
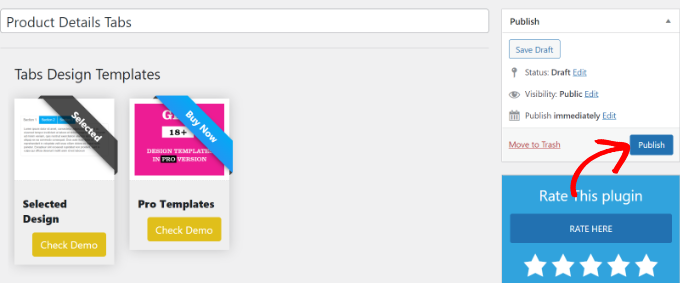
When you’ve made the changes, you can now use the tabs in any blog post or page using the shortcode generated by the plugin.
Simply click the ‘Publish’ button.
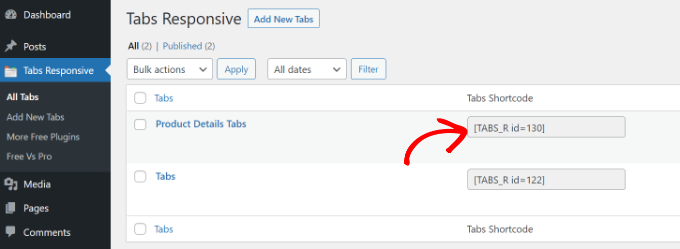
Next, you can add the tabs on any page or post using the [TABS_R id=130] shortcode. Just make sure to replace the ID number in the shortcode with your tabs ID number.
You can easily find the tab ID and shortcode by going to Tabs Responsive » All tabs and copying the code under the Tabs Shortcode column.
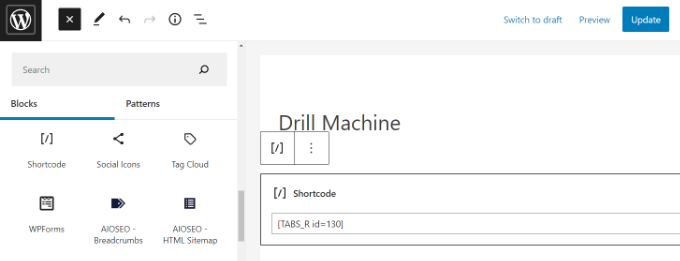
Next, you just need to either add a new post or edit an existing one.
When you’re in the content editor, go ahead and add a shortcode block to enter the shortcode.
After that, you can preview your blog post or page. If everything checks out, you can click the ‘Publish’ or ‘Update’ button to save the tabs in your post.
Now, visit your website to see the tabbed content in action.

")


")


")
Leave a Reply